Angular2 and Spring Boot: Getting Started
Combining Angular2 and Spring Boot is a great way of getting up and running quickly with a new web application. However, it can be challenging to fit all the different pieces together in the beginning. In this blog post we will create a new project that is easy to build and run across different environments.
The goal is to create a minimal, but runnable, application with as little dependencies and setup as possible. You can then start expanding the application however you see fit. We will create the Angular2 application using angular-cli. This allows us to easily generate a new project with a clear structure. This will also make it easy to add new elements to our Angular2 application. When adding new elements with angular-cli, we will maintain the same structure and wire the new elements together automatically. Angular-cli is an npm module, so it requires Node and npm to install and run. Make sure to install a recent version of both of these applications before continuing with the steps below. We will use Maven as the overall build manager for our application. The steps should be easy to follow and will not require a lot of work. However, you can get the result directly in this GitHub repository if you want to. There is a seperate commit for every step.
Step 1: G**enerate a new Spring Boot project
The first step is to generate a new Spring Boot project at https://start.spring.io. I've used the values in the screenshot below. Of course you can use your own group and artifact ids. We need at least the Web plugin to let Spring Boot serve the Angular2 application. If you already know you need more dependencies for your project, feel free to add them.
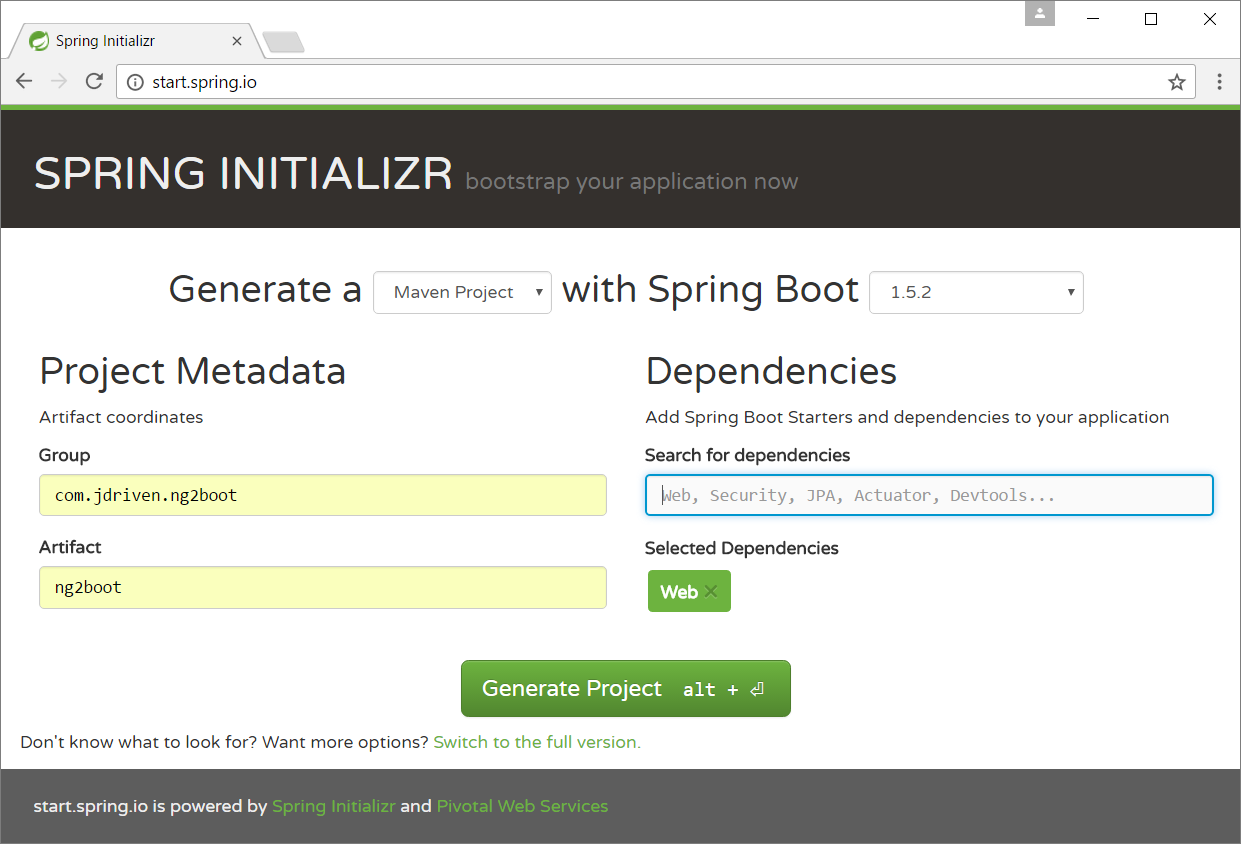
Click on Generate Project to download the zip file with your new Spring Boot project. Extract the zip file somewhere on your computer. Then open a command prompt and go to the newly created project directory.
Step 2: Split the project into seperate modules
We will want to use seperate Maven modules for the front-end and backend. Let's start by creating the correct directory structure and copying the pom file.
Microsoft Windows [Version 10.0.14393]
(c) 2016 Microsoft Corporation. Alle rechten voorbehouden.

C:\Users\Jeroen>cd c:\ng2boot

C:\ng2boot>mkdir backend front-end\src\main

C:\ng2boot>move src backend
        1 dir(s) moved.

C:\ng2boot>copy pom.xml backend
        1 file(s) copied.

C:\ng2boot>
Edit pom.xml in the top level project directory and make it look like this:
<?xml version="1.0" encoding="UTF-8"?>
<project
  xmlns="http://maven.apache.org/POM/4.0.0"
  xmlns:xsi="http://www.w3.org/2001/XMLSchema-instance"
  xsi:schemaLocation="http://maven.apache.org/POM/4.0.0 http://maven.apache.org/xsd/maven-4.0.0.xsd"
>
  <modelVersion>4.0.0</modelVersion>

  <groupId>com.jdriven.ng2boot</groupId>
  <artifactId>parent</artifactId>
  <version>0.0.1-SNAPSHOT</version>
  <packaging>pom</packaging>

  <name>parent</name>
  <description>The ng2boot parent project</description>

  <parent>
    <groupId>org.springframework.boot</groupId>
    <artifactId>spring-boot-starter-parent</artifactId>
    <version>1.5.2.RELEASE</version>
    <relativePath /> <!-- lookup parent from repository -->
  </parent>

  <properties>
    <project.build.sourceEncoding>UTF-8</project.build.sourceEncoding>
    <project.reporting.outputEncoding>UTF-8</project.reporting.outputEncoding>
    <java.version>1.8</java.version>
  </properties>

  <modules>
    <module>front-end</module>
    <module>backend</module>
  </modules>
</project>
Next, edit pom.xml in the backend directory and make it look like this:
<?xml version="1.0" encoding="UTF-8"?>
<project
  xmlns="http://maven.apache.org/POM/4.0.0"
  xmlns:xsi="http://www.w3.org/2001/XMLSchema-instance"
  xsi:schemaLocation="http://maven.apache.org/POM/4.0.0 http://maven.apache.org/xsd/maven-4.0.0.xsd"
>
  <modelVersion>4.0.0</modelVersion>

  <artifactId>backend</artifactId>

  <name>backend</name>
  <description>The ng2boot backend project</description>

  <parent>
    <groupId>com.jdriven.ng2boot</groupId>
    <artifactId>parent</artifactId>
    <version>0.0.1-SNAPSHOT</version>
  </parent>

  <dependencies>
    <dependency>
      <groupId>org.springframework.boot</groupId>
      <artifactId>spring-boot-starter-web</artifactId>
    </dependency>

  <dependency>
      <groupId>org.springframework.boot</groupId>
      <artifactId>spring-boot-starter-test</artifactId>
      <scope>test</scope>
    </dependency>
  </dependencies>

  <build>
    <plugins>
      <plugin>
        <groupId>org.springframework.boot</groupId>
        <artifactId>spring-boot-maven-plugin</artifactId>
      </plugin>
    </plugins>
  </build>
</project>
Finally, copy the pom.xml from the backend directory to the front-end directory and edit it to look like this:
<?xml version="1.0" encoding="UTF-8"?>
<project
  xmlns="http://maven.apache.org/POM/4.0.0"
  xmlns:xsi="http://www.w3.org/2001/XMLSchema-instance"
  xsi:schemaLocation="http://maven.apache.org/POM/4.0.0 http://maven.apache.org/xsd/maven-4.0.0.xsd"
>
  <modelVersion>4.0.0</modelVersion>

  <artifactId>front-end</artifactId>

  <name>front-end</name>
  <description>The ng2boot front-end project</description>

  <parent>
    <groupId>com.jdriven.ng2boot</groupId>
    <artifactId>parent</artifactId>
    <version>0.0.1-SNAPSHOT</version>
  </parent>

  <build>
    <plugins></plugins>
  </build>
</project>
Step 3: Add the Angular2 application to the project
If angular-cli is not installed on your system already, use npm to install it now.
C:\ng2boot>npm install -g @angular/cli
To keep the blog post readable, I'm not showing the output of the command. You can ignore any warnings about optional dependencies. The -g flag tells npm to install it globally. This means you can run the command ng from the command line anywhere on your computer. Let's use angular-cli to generate our Angular2 application in the front-end\src\main\front-end directory.
C:\ng2boot\front-end\src\main>ng new --skip-git --directory front-end ng2boot
installing ng
 create .editorconfig
 create README.md
 create src\app\app.component.css
 create src\app\app.component.html
 create src\app\app.component.spec.ts
 create src\app\app.component.ts
 create src\app\app.module.ts
 create src\assets\.gitkeep
 create src\environments\environment.prod.ts
 create src\environments\environment.ts
 create src\favicon.ico
 create src\index.html
 create src\main.ts
 create src\polyfills.ts
 create src\styles.css
 create src\test.ts
 create src\tsconfig.app.json
 create src\tsconfig.spec.json
 create src\typings.d.ts
 create .angular-cli.json
 create e2e\app.e2e-spec.ts
 create e2e\app.po.ts
 create e2e\tsconfig.e2e.json
 create karma.conf.js
 create package.json
 create protractor.conf.js
 create tsconfig.json
 create tslint.json
Installing packages for tooling via npm.
Installed packages for tooling via npm.
Project 'ng2boot' successfully created.

C:\ng2boot\front-end\src\main>
We just told angular-cli to generate a new project. We let it skip creating a git repository, because we are not in the top level directory of our project. We specified that the output directory should be front-end and called the new application ng2boot. We chose src\main\front-end to prevent maven from putting the source files, including the node_modules directory, in our jar.
Step 4: Configure Maven to build the Angular2 application
We will use the front-end-maven-plugin to build the Angular 2 application with Maven. First, let's add the plugin to the fronted pom in the build/plugins section.
<plugins>
  <plugin>
    <groupId>com.github.eirslett</groupId>
    <artifactId>front-end-maven-plugin</artifactId>
    <version>1.3</version>

    <configuration>
      <nodeVersion>v6.10.1</nodeVersion>
      <npmVersion>4.4.1</npmVersion>
      <workingDirectory>src/main/front-end</workingDirectory>
    </configuration>

    <executions>
      <execution>
        <id>install node and npm</id>
        <goals>
          <goal>install-node-and-npm</goal>
        </goals>
      </execution>

      <execution>
        <id>npm install</id>
        <goals>
          <goal>npm</goal>
        </goals>
      </execution>

      <execution>
        <id>npm run build</id>
        <goals>
          <goal>npm</goal>
        </goals>

        <configuration>
          <arguments>run build</arguments>
        </configuration>
      </execution>
    </executions>
  </plugin>
</plugins>
We specify the node and npm versions and the working directory in the
configuration section. We also add three executions. The first execution
downloads and installs node and npm to the directories node and
node_modules. Npm will download a lot of packages, so add both directories to
the ignore list of your version control system. The second execution runs npm
install in the working directory to download all npm dependencies of our
project. The third execution runs npm run build in the working directory to
build the Angular2 application. By default, angular-cli will write the final
Angular2 application in the src/main/front-end/dist directory. We can adhere
to the Maven standard directory layout better by configuring angular-cli to
write it to the target directory. This will also delete the built application,
along with all other build artifacts, when we run mvn clean. Edit
.angular-cli.json and change the outDir in the apps section.
"apps": [
  {
    "root": "src",
    "outDir": "../../../target/front-end",
    "assets": [
      "assets",
      "favicon.ico"
    ],
    "index": "index.html",
    "main": "main.ts",
    "polyfills": "polyfills.ts",
    "test": "test.ts",
    "tsconfig": "tsconfig.app.json",
    "testTsconfig": "tsconfig.spec.json",
    "prefix": "app",
    "styles": [
      "styles.css"
    ],
    "scripts": [],
    "environmentSource": "environments/environment.ts",
    "environments": {
      "dev": "environments/environment.ts",
      "prod": "environments/environment.prod.ts"
    }
  }
]
Step 5: Let Spring Boot serve the Angular2 application
Maven will now build (and clean) the Angular2 application, but it will not end up in our final jar. Spring Boot will serve static content from a number of directories on the Java classpath. So we have to make sure that the Angular2 application ends up in one of those directories. Files on the classpath that are not Java classes, are known as resources. Maven copies all resources (normally found in src\main\resources) into the final jar. Add the packaged Angular2 application to the resources by adding the snippet below to the build section in pom.xml. The given targetPath will put it in /static on the classpath and Spring Boot will serve it from there.
<resources>
  <resource>
    <directory>target/front-end</directory>
    <targetPath>static</targetPath>
  </resource>
</resources>
Because the Spring Boot backend is in another module, we will need to add a dependency to the Angular2 application. Edit the backend pom file and add the following to the list of dependencies.
<dependency>
  <groupId>com.jdriven.ng2boot</groupId>
  <artifactId>front-end</artifactId>
  <version>${project.version}</version>
  <scope>runtime</scope>
</dependency>
Step 6: Fire it up!
We are now ready to build and run our application. From the top level directory of our project, run:
mvn clean install
cd backend
mvn spring-boot:run
Wait for the application to start and then point your browser to http://localhost:8080
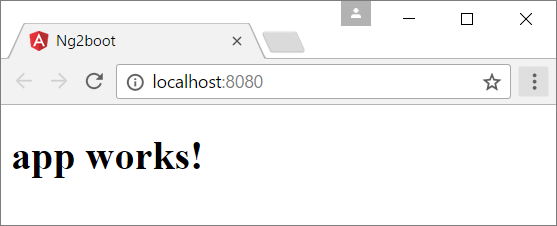
If you have configured everything properly, your application should look just like the above image. If it doesn't, have a look at the GitHub repository which has the finished application in it. And of course, don't hesitate to leave a reply if you're having trouble getting the application to build or start.
Step 7: Using the angular-cli development server with your Spring Boot backend
One of many nice features of angular-cli is the development server. It will serve the Angular2 application, just like Spring Boot. However, every time we save a source file, it will automatically rebuild the application and refresh the browser. There is one problem though. Maven (running our backend) and the development server (running our front-end) are seperate processes listening on seperate ports. This prevents Angular2 from making backend requests because it violates the Same Origin Policy of our web browser. Web browsers only allow backend requests to the same origin that the web application making the requests was downloaded from. Thankfully, we can let angular-cli act as a proxy for our Spring Boot backend. The Angular2 application will send backend requests to thedevelopment server, which will forward them to Spring Boot. Now, the Angular2 application can make backend requests to the same origin it came from. Edit package.json and change the start script to add the proxy configuration.
{
  "scripts": {
    "ng": "ng",
    "start": "ng serve --proxy-config proxy.conf.json",
    "build": "ng build",
    "test": "ng test",
    "lint": "ng lint",
    "e2e": "ng e2e"
  }
}
The start script now references proxy.conf.json. Create that file, with the following content:
{
  "/api": {
    "target": "http://localhost:8080",
    "secure": false
  }
}
This configuration assumes all backend requests will be made to (sub paths of) /api. You can of course choose any url you like. Now, when you run npm start in the front-end\src\main\front-end directory, the development server will run your Angular2 application. It can be reached at http://localhost:4200. Don't forget you have to start your backend seperately. You can do this by running mvn spring-boot:run in the backend directory. I hope you enjoyed this blog post. If you found it useful, or if you have any questions, please let me know by leaving a reply. Happy coding!


 Frameworks at Crossroads Europalaan 93, 3526 KP Utrecht